How to Install Zebra Label Printer?
- If you currently have a version of Browser Print or Zebra Web Driver installed, use the instructions for Uninstallation to uninstall it.
Installation
- Run the installer executable “ZebraBrowserPrintSetup-1.2.X.exe”.
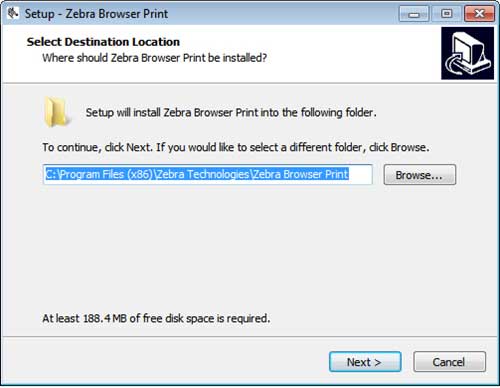
- Select where you would like to save the Browser Print files and click “Next”.
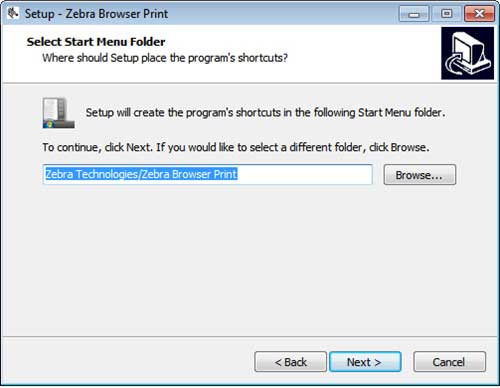
- Select where you would like to run the program from and click “Next”.
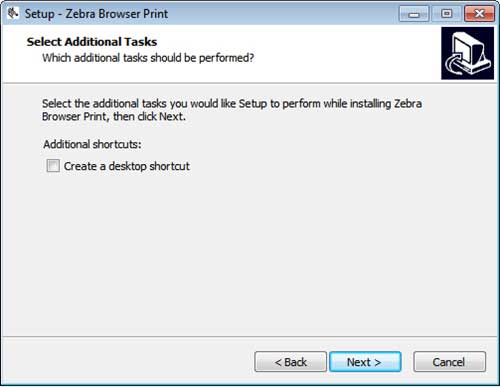
- Decide if you want to have a desktop icon for Browser Print and click “Next”.
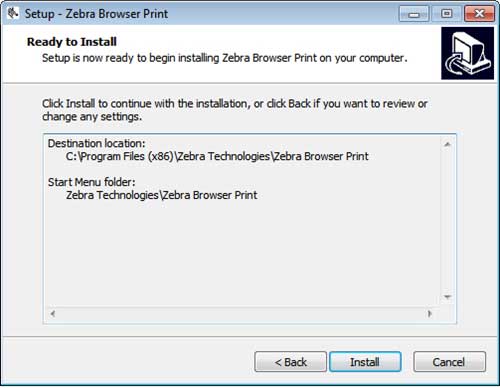
- Click “Install”.
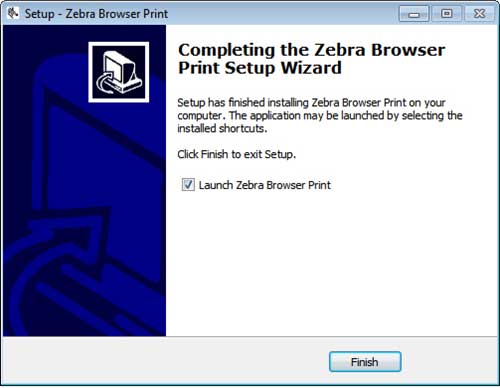
- Check the box to launch Zebra Browser Print and click “Finish”. If you do not check the box, Zebra Browser Print will be launched the next time you restart your computer.
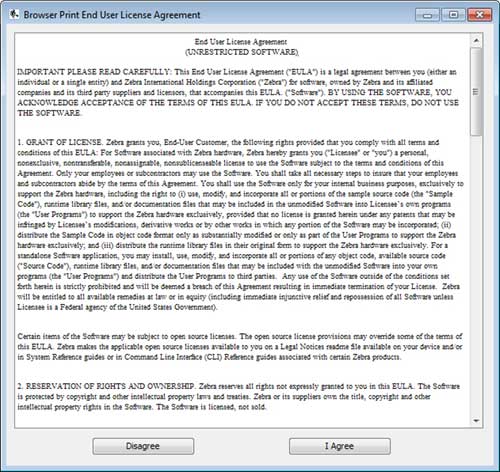
- When the program runs for the first time, the End User License Agreement will pop-up. Select “I Agree”.
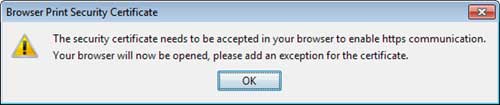
- A pop-up about communicating with a web browser will appear. Click “OK”.
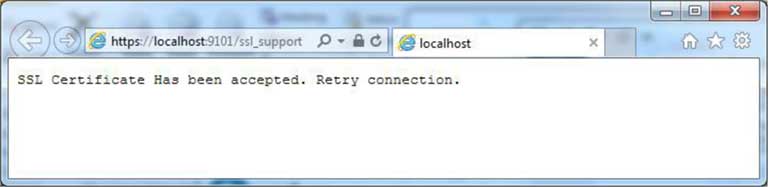
- In a web browser, it displays that the SSL Certificate has been accepted.
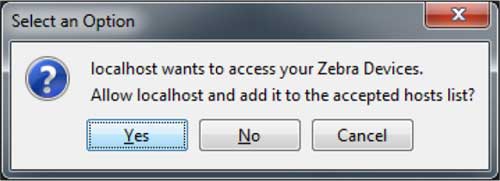
- A pop-up will appear requesting access to any connected Zebra devices. Select Yes.
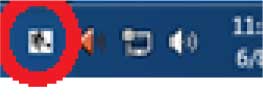
- A Zebra logo icon will also appear in your system tray this indicates that Zebra Browser Print is running.
Uninstallation
- Right click the Browser Print icon in your system tray.
- Select Exit. This makes Browser Print cease function in the background. The icon should disappear.
- Enter the Windows Start menu and open your computer’s Control Panel.
- Click Programs and Features. Scroll down to Zebra Browser Print.
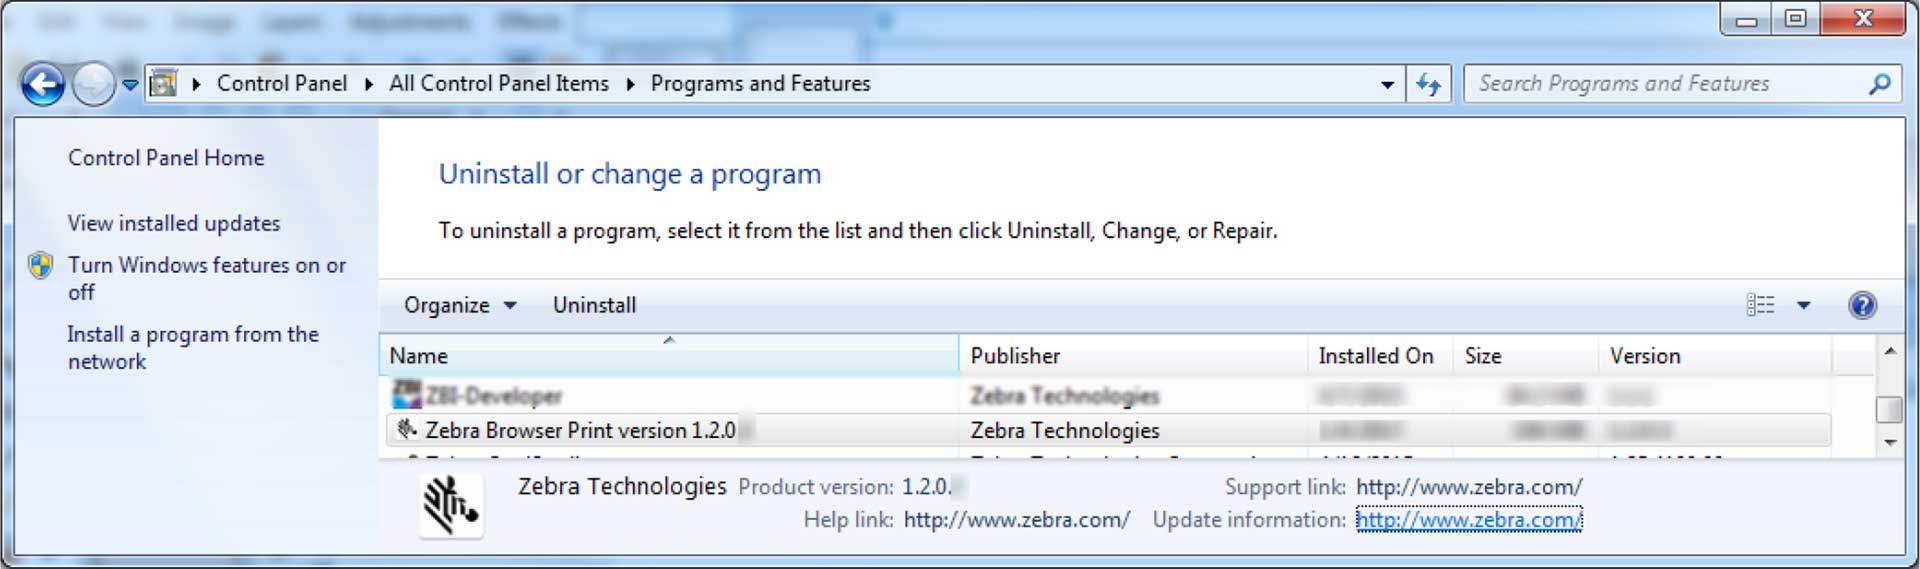
- Right click Zebra Browser Print and select Uninstall.

- Zebra Browser Print will then be uninstalled by your computer. The Zebra Browser Print icon will disappear from your system tray and the Browser Print directory will no longer be on your system.